Chapter 16 - End User Experience
REALTIMEDESIGNER FROM THE END USERS PERSPECTIVE
By the time you get into this manual, it is quite likely that you have already mastered the simple
drawing environment of the designer. This chapter will go into some detail of the lesser known
features with the hopes that you can find ways to improve the users experience, by knowing these. You
may be called upon by users of your site asking “How do i do……?”
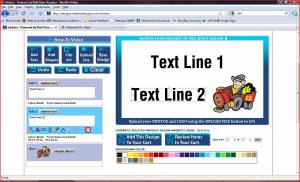
Below is a image of a designer screen. Yours might be quite different in appearance, but the
functionality remains the same.
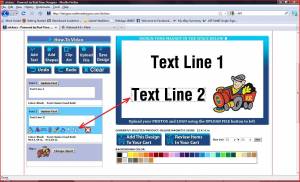
 Design elements are lines of text, geometric shapes, clip art files and user upload files. When drawing,
only one design element is active at a time. The active element is displayed in the designer window
with a dashed box around it. Notice that a tool bar appears under the design element in the list of
elements.
 Clicking on these tools either performs the action or opens another frame showing options related to
that tool. The screen shot below shows the edit color frame.
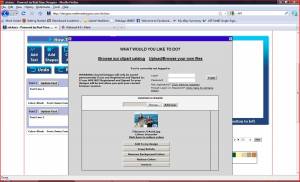
 A critical part of the RealTimeDesigner is the ability for users to upload their own artwork files. The
screen shot below shows the FILE UPLOAD tool after the user has uploaded a file.
 Notice that there are five buttons below the thumbnail image. These buttons are described below.
- ADD TO MY DESIGN - the file is not yet added to the design, it resides in the end users folder
- CROP/ROTATE - quick, easy crop rotate tool
- REMOVE BACKGROUND COLORS - point & click to remove colors
- REDUCE COLORS - reduces colors to reduced palette
- REMOVE - deletes the file from the users folder


