This is an old revision of the document!
Chapter 4 - Designer Setup
DESIGNER SETUP
The Designer Setup section describes how to configure the online design tool. Most everything about the looks and behavior of the RealTimeDesigner can be controlled. The LAUNCH DESIGNER link will open a new window showing how your designer is currently configured. As you make changes, simply refresh your designer screen to see the changes. Let's begin.
GENERAL SETUP
The first item on the DESIGNER SETUP > GENERAL SETUP screen is “Units Decimal Places”. A default setting of 2 decimal places is usually fine. This number can be changed later if you desire. The Startup Disclaimer is an optional message you can force users to acknowledge before entering the designer. You can also place the link to a printable version of the disclaimer if you desire. The Decline Redirect URL is the link where you wish to redirect users who do not accept the terms of the disclaimer. The “Check String” routine allows you to test whether visitors came from a particular site. If the visitor came from an outside link, you way wish to redirect him to a start up page in your site. STYLE SETUP The DESIGNER SETUP > STYLE SETUP screen doesn't show a whole lot upon entry. The RealTimeDesigner allows you to save 10 styles or themes for your designer. Select STYLE 1 from the pull down list.
ICONS AND IMAGES
Next, click on the ICONS AND IMAGES link. The screen will fill with 3 columns. The first column
lists the name of each image. The second column shows the image. The third column allows you to
upload a new image which will replace the current image. You will need to click the SAVE button to
permanently save your changes.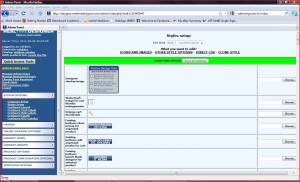 If you wish to change an image, we recommend that you replace the image with an identical size at
first. If your image sizes change, that image and many others may move to unpredictable places on the
screen. You can determine the image size in pixels by right clicking on the image and selecting
properties. Once you become familiar with the various aspects of setting up the RealTimeDesigner,
you will be able to completely reconfigure the look if you so desire. You will be able to upload images
whatever size you desire once you learn the basics of positioning the elements on your screen.
HIDING ICONS AND IMAGES
If for some reason, you desire that a particular icon or image is hidden from your users, and there is no option to delete the current image, a trick try is to use a 1×1 pixel transparent gif image.
OTHER STYLE OPTIONS
The OTHER STYLE OPTIONS link will display many rows of data that control where and how things
are displayed in the RealTimeDesigner. When making changes, always make note of the current value.
Make your changes and thoroughly check to see how your changes affect the designer. If the
unexpected occurs, change back to the original value while you determine what the proper setting
should be. Color values are entered using hexadecimal values. Search the web for HEXIDECIMAL
COLOR CHARTS if you need help determining color values.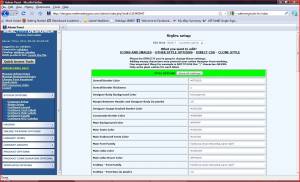
DIRECT CSS
The DIRECT CSS link opens a screen where you can place CSS code directly into the designer. CSS is described in greater detail later in this manual but basically it is a way to use computer code to override most any of the internal settings of the designer.
CLONE STYLE
The CLONE STYLE link allows you to copy all the style settings of a particular style. This is useful if you want to make changes to your current style without affecting what your users see.
CONFIGURE LAYOUT
From the STYLES SETUP > CONFIGURE LAYOUT link, the STYLE TO USE box is where you
choose which of the 10 styles you wish to have active in your designer. The TEST STYLE TO USE
allows you to select which style you wish to view while you have a new style under development.
Keep in mind that while you are logged into the Admin Panel, any designers you open in your current
browser will be displayed as ADMIN VERSIONS - they will be slightly different from what the end
user sees. Final testing of style changes should always be done using another browser or computer so
that you are certain what your end users will be seeing. As anyone who has built a few web pages
knows, different browsers may display the exact same code differently. When you are sure that your
TEST STYLE is fully working, change the STYLE TO USE to match.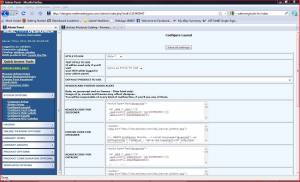
HEADERS AND FOOTERS
The Configure Layout screen also allows you to paste text including HTML code so that you can develop complex headers and footers with navigation and images.
LAYOUT BUILDER
At the bottom of the CONFIGURE LAYOUT screen is the LAYOUT BUILDER. This powerful tool
automatically generates the code to reposition each of the parts of the designer to various places on the
screen. By clicking the MOVE UP and MOVE DOWN buttons, you will see the mockup image to the
right change. Make a few changes, then launch your designer to see these changes on your site. These
changes are live so be careful. Typically this is only changed when your site is under initial
development. Use the RESET TO DESIGNER DEFAULT button if needed.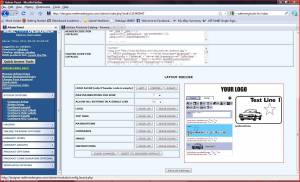
CONFIGURE TEXT LABELS
The CONFIGURE TEXT LABLES screen displays hundreds of lines of text. Nearly every line of text
that appears in the RealTimeDesigner is customizable on this screen. You can change how this text is
displayed to your users by simply finding the appropriate one, making changes and then clicking save.
Use your web browsers FIND feature to locate a specific text string that you wish to change. There are
some text labels that are identical or nearly identical - be sure to test to make sure that you are getting
the desired effects.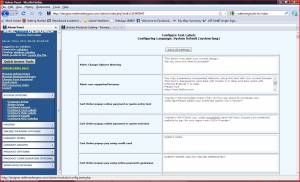
CONFIGURE HELP LABELS
The CONFIGURE HELP LABELS screen has 2 large text edit boxes. The first box contains the HELP
TEXT that is displayed at all times on the designer screen. This text is not limited to instructions - you
can put anything in this box that you wish users to see at all times while in the designer. This box
allows HTML code if you wish.
The lower box contains the HELP TEXT that is displayed when the user clicks on the HELP button in
the designer. You can place most any HTML code you wish in this box including links to videos if you
wish.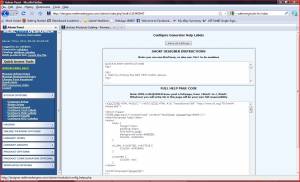 :next_arrow_c.gif?nolink&100 |]]


