This is an old revision of the document!
Chapter 3 - Catalog Setup
THE REALTIMEDESIGNER CATALOG
The RealTimeDesigner Catalog generates web pages displaying all the products you have built within
the RealTimeDesigner in a neat, structured fashion. When you add or edit products, those changes
immediately appear in the RealTimeDesigner Catalog. You never have to worry about the data in your
catalog matching the data within the RealTimeDesigner. The RealTimeDesigner Catalog is a fairly
recent addition. Several of our early clients who started with us before the advent of the Catalog
system, developed their own pages and simply link to the RealTimeDesigner for the DESIGN ONLINE
environment. 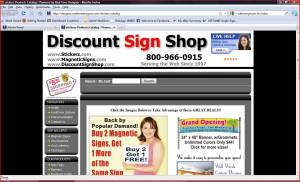 In this Chapter we will describe how to set up your Catalog and how to bypass the
catalog if you have or are building a website which will act as the catalog of your products. IF you
intend to use your own web pages or an external cart system such as MAGENTO or VOLUSION, most
of the information in this chapter will not be of use to you. We encourage you to read through it though
as you may find information that will help you elsewhere in the RealTimeDesigner.
CATALOG BASICS
In general terms, the Catalog simply shows each product you have on your site in a CATEGORY - SUBCATEGORY - PRODUCT drill down format. The first step in developing your RTD Catalog is to have a good understanding of what products you intend to offer on your site. Your list should be broken into a structure of CATEGORIES and PRODUCTS. If your site will have more than 10 categories or 6-10 products in a category, we recommend that you use the CATEGORIES - SUBCATEGORIES - PRODUCTS structure to limit choices on the screen at one time. To view your catalog click CATALOG SETUP > LAUNCH CATALOG. If the link for this page is given to users, they will also be directed to your catalog. In the chapter titled PRODUCTS SETUP you will learn more about 10 adding products to the catalog along with product descriptions and images. This chapter is devoted to showing you how to work with the Catalog structure.
CATALOG DIRECT LINKS
Notice that while you are logged into the Admin Panel, when you navigate through the Catalog, the URL in your browser changes. You can copy/paste this link to bring clients directly to this page.
CATALOG GENERAL SETUP
The GENERAL SETUP screen has several global settings that apply to your catalog. The first item on the page is the ability to allow users to enable search capabilities on your site. The OPEN PAGE CODE section is where you insert a link for a splash page that will appear when users visit the catalog. The page must be build on your own server, but will be displayed in a frame within the catalog. A common use for the splash page is to show your specials or seasonal information. You will need to experiment with the Frame Size so that the frame properly fits your site. If it's too big, users will see unsightly scroll bars. If it's too small, you are wasting valuable first impression real estate on your site. The REDUCED CATALOG CONFIG refers to the pop up list of products that your users are shown when they are in the designer and change products. This is where you place a link to an external catalog that replaces the internal reduced catalog shown within the designer. Be sure to SAVE changes made on this screen. If you do not see the expected changes after saving, you may find it necessary to refresh or clear your browsers cache to view the changes.
CATALOG MENU LINKS
By default, the CATALOG MENU is the column of links at the left side of the Catalog. If the
CATALOG SETUP > MENU LINKS table is empty, the catalog will display links to each product
category that exists in your site. 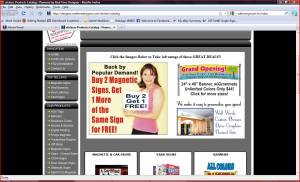 You can override this default by building your own MENU LINKS
table. To create a new table, Enter the number “10” in the Show Order field and follow that with the
text you wish to show on the side menu such as “SALE PRODUCTS” in the NAME column. In the
PARENT column select “NONE - TOP LEVEL”. In the LINK column, paste a link where you wish to
navigate when SALE PRODUCTS is selected. You can get this link by browsing through the catalog
and copying the URL or you will see a list of direct links to each category at the bottom of the
CATALOG > MENU LINKS page. Choose whether to open the link within the CATALOG or a NEW
WINDOW. Do these steps again for the next item in your side menu, but enter “20” for the Show
Order. Leaving gaps in the Show Order numbers will allow you to easily insert new items into the
menu without having to renumber them.
You can create a tree structure to the side menu by selecting previously defined names as PARENT to
the newly defined name. Any link with a PARENT will automatically be shown below its PARENT
regardless of the show order. If you leave the LINK blank for any menu items, they will appear as
labels only with no navigation purpose. This structure is useful if you wish to create a side menu with
sections or groupings. An example side menu tree structure might look like this:
SIGNS
- Magnetic
- Yard Signs
- Banners
CLOTHING
- T Shirts
- Hats
- Team Uniforms
…
OUR SPECIALS
SOME OTHER SITE
The parent links (SIGNS, BANNERS) would be blank. The links to the specific items would be filled with direct links to those products. OUR SPECIALS would contain a direct link to…. SOME OTHER SITE would contain the URL for a site outside the catalog. Be sure to save each row as you make changes. If you change data in more than one row, only the row you click save on is actually saved. Your other changes will be lost.
IMAGES IN SIDE MENU
You can embed images anywhere in the side bar menu by placing the URL of the image into the
NAME field. Images can be strictly visual, or you can provide a link for navigation.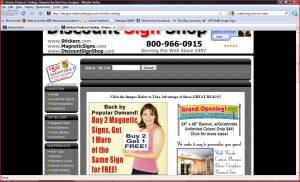
CHANGING CATALOG NAVIGATION
There are two ways to control the navigation choices offered to your visitors. The first involves adding links in the SHORT DESCRIPTION. By default the clicking on the Product Name in the SHORT DESCRIPTION, users are led tot he LONG DESCRIPTION page. By using [SPECIAL_CODES] in the PRODUCT OPTIONS > Manage/Define Products > EDIT> Optional Description Extra code (for catalog) box you can place buttons or links in the SHORT DESCRIPTION directly to:
- Blank Designer
- Long Description
- List of Templates
- First Product Template
Placing the following code in the Optional Description Extra code box will create to buttons - one that simply goes to the long description page and one to go directly to a blank designer - jumping the long description, size input and templates pages.
<input type=“button” OnClick=“location.href='[LONG_DESCRIPTION]';” Value=“More Info”>
<input type=“button” OnClick=“location.href='[DESIGN_BLANK]';” Value=“Design It Now”>
The second way to change the catalog navigation is to use the PRODUCT OPTIONS > Manage/Define Products > EDIT>CATALOG LAUNCH OPTIONS. These changes affect the choices shown to users on the LONG DESCRIPTION page. You have the following options:
- Enable Designer Only (blank + all templates)
- Enable Designer Only (blank + product templates only)
- Enable Designer Only (all templates only)
- Enable Designer Only (product templates only)
- Enable direct to cart Only
- Enable All
- Disable All
EXTERNAL LINK BUILDER
The External Link Builder allows you to embed html pages stored outside the RealTimeDesigner within the catalog. Similar to the splash page described earlier, you can paste the URL of the external pages into the URL box of the OWN PAGES - EXTERNAL LINK BUILDER. When you click CREATE LINK a link of the external page embedded into the catalog will be returned to you. Use the returned link in the side menu or anywhere else you wish to display that page.
PRODUCT SECONDARY CATEGORIES SETUP
With the PRODUCT SECONDARY CATEGORIES you can create virtual categories that contain copies of your products. This feature allows you to duplicate a product in various areas of the catalog without the burden of having to separately maintain multiple copies of the same product. To use this feature, enter a number in the SHOW ORDER field and a name for the secondary catalog in the NAME field and click ADD NEW. Once the screen refreshes click the EDIT button to display the a list of all products in your site. Select the products that you wish to populate the SECONDARY CATEGORY with. Refresh the catalog and you should find a new category containing all the products that you selected.
RELATED PRODUCT GROUPS
When users surf your site, you can display related products to them to create cross sales. To enable this feature, enter a name such as “SUMMER PRODUCTS” in the NAME field and click ADD NEW. A new screen will appear that lists every product defined in your system. Select all the products that are related to SUMMER PRODUCTS and SAVE your changes. In the catalog, when any of these products are viewed, all the related products will be displayed in a “YOU MAY ALSO BE INTERESTED IN…” fashion.
STYLE SETUP
The STYLE SETUP screen allows you to edit or upload CSS code. CSS stands for Cascading Style Sheets. You can search this term on the web, but in very basic terms, it allows you to develop very detailed coding to control the formatting of your pages. One CSS file will apply to all your catalog pages so it is a very powerful yet compact way to control the look of your catalog pages versus standard HTML coding which can be very long, tedious and lacking in ability to control various aspects of your pages. A person well versed in CSS can download the default CSS, make changes and upload the new file. A few changes to the CSS file can drastically change the look of the catalog.
SETTING UP CATALOG COLUMNS
The Define Columns box at the bottom of the STYLE SETUP screen is where you control the number
of columns displayed in the catalog. Most users choose a consistent 2 or 3 for these values, but you can
individually set these however you find best for your site.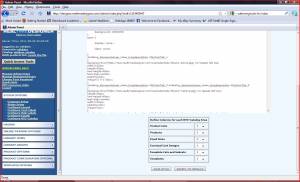
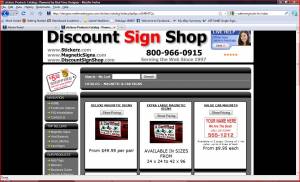
CSS TRICK - HIDING THE SIDE MENU
By adding the line:
#catalog_menulinks {display:none;}
in your css file you should be able to turn off
the menu on the left side of the screen. If you have not yet worked with the css go to SYSTEM
OPTIONS → Configure RTD- → STYLE SETUP Once you learn a bit about CSS, you can do some
fancy stuff inside the RTD catalog. Be sure to keep a backup copy of your CSS locally in case you
really mess things up. Regarding the shameless plug for ourselves at the bottom of the page, it's our
way of finding new clients.


