This is an old revision of the document!
Chapter 11 - Processing Orders
WORKING WITH ORDERS
The ultimate goal of the RealTimeDesigner is ORDERS. Thus far we've learned how to set up the various parts of the RealTimeDesigner so that users can create designs and submit orders. Now it's time to learn to work with the orders. We'll learn to view, search for orders, interacting with the client, exporting order information, downloading the users designs and getting reports about orders.
VIEWING AND SEARCHING ORDERS
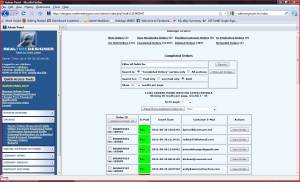
From the MANAGE ORDERS link on the Admin Panel you will be directed to the MANAGE
ORDERS screen.
[screen shot]
The screen is laid out with links to the 8 folders where all orders are stored. The default view when
you arrive at this screen is the NEW ORDERS folder. The mid portion of the screen is where you
apply filters to search the orders. The lower portion of the Manage Orders screen is where links to the
orders matching the current filters/folders criteria are displayed. Clicking on the VIEW ORDER button
next to an order will display the detailed information about the order.
WORKING WITH ORDER DETAILS
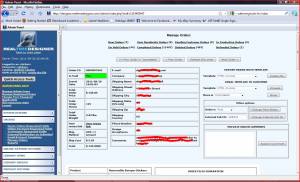
From the View Order button, the detailed information about an order is displayed. The top portion of
this screen contains general order data. The bottom portion will contain a frame of data for each item
in the order. Thus if the client ordered two different signs, there will be two complete frames at the
bottom of the screen. Make sure you don't forget to scroll all the way to the bottom of the page. The top portion of the screen contains 3 columns. The left column is Order Data, the middle is
Customer Data and the right column is devoted to controls for the order. The controls include Export
Order Data, Email To Customer, Move the order to another folder, Mark the order Paid, Internal Order
ID and Private Order Comments. The Internal Order ID field is used to insert the order number of an
external order tracking system such as QuickBooks.
EMAIL AND EXPORT TEMPLATES
Export Order Data and Email To Customer are very customizable. In the RealTimeDesigner, you create templates using variables. When these templates are used, the variables are filled in with order specific data. The templates can be very simple or very detailed. Full HTML control is available in the design or your Email and Export Templates. Click on the Email and Export Templates link in the Admin Panel. A page similar to the following will be shown. [screen shot] This screen basically contains six field to be filled in. Next to four of these fields are SPECIAL CODE buttons. Special Codes refer to the variables available to each field. The special codes are different for each of these four field. To create an email template with the subject line reading “CONFIRMATION FOR ORDER #123456” you would enter CONFIRMATION FOR ORDER #[ORD_NUM] in the subject line field of the template. Click the Special Codes button and copy/paste the special code exactly as it is shown to avoid typing errors. 105
STRUCTURE OF THE TEMPLATES
The structure of the templates is built around the one-to-many relationships between Orders, Items and Sides. One order can have several items. Each item can have several sides. If you wish to include Item data in your template, you must include the [ORD_ITEMSTEMPLATE] Special Code within the Orders field. If you wish to include Sides data in your template, you must include the [ORD_SIDESTEMPLATE] Special Code within the Items field. When the RealTimeDesigner implements the template, it will loop through the order data for every occurrence of items/sides when these Special Codes are encountered. You can not use Special Codes for one field within another field. They are field specific. There are some examples of these forms in the forum. Pay particular attention that any Special Codes of a format like [USERFIELDS_1_1420] are specific to YUR SITE ONLY. These are variables defined by you in your Quote/Online Payment Request Fields forms. If you copy and paste these user defined Special Codes from someone else, they will have no meaning in your site.
DETAILED EXAMPLE OF EXPORT TEMPLATE
Below is an example of an actual export form used to export order data to an external accounting system. Each of the three fields Orders-Items-Sides are shown.
*ORDER TEMPLATE FIELD FOLLOWS*
parser: stickerz-payment-rtd
email: [USERFIELDS_7_118]
tng_orderid: [ORD_NUM]
company: [USERFIELDS_7_1595]
name: [USERFIELDS_7_119]
address: [USERFIELDS_7_120]
city: [USERFIELDS_7_121]
st: [USERFIELDS_7_123]
Zip: [USERFIELDS_7_124]
Phone: [USERFIELDS_7_1954]
comments: [USERFIELDS_7_459]
notes: [USERFIELDS_7_459]
shipping: [ORD_SHIP_PRICE]
shipmethod: [ORD_SHIP_METHOD]
Acceptance: [USERFIELDS_7_2225]
Comments: [USERFIELDS_7_2226]
link: [ORD_USERREVISE_LINK]
[ORD_ITEMSTEMPLATE]
*ITEM TEMPLATE FIELD FOLLOWS*
NEW ITEM
item: [ITEM_PARTNUM]
unitwt: [ITEM_UNITWEIGHT]
price: [ITEM_UNITPRICE]
qty: [ITEM_QUANTITY]
add-ons: [ITEM_PRICEADDONS]
background color: [ITEM_BGCOLOR]
color: [SIDES_TXTCOLOR_1]
product: [ITEM_PRUDUCT]
description: [ITEM_SIZENAME]
[ITEM_SIDESTEMPLATE]
END OF ITEM
*SIDES TEMPLATE FIELD FOLLOWS*
line1: [SIDES_TXTLINE_1]
width: [SIDES_INCHSIZE_W]
height: [SIDES_INCHSIZE_H]
color1: [SIDES_TXTCOLOR_1] [SIDES_TXTCOLORNAME_1]
font1: [SIDES_TXTLINE_FONT_1]
line2: [SIDES_TXTLINE_2]
width: [SIDES_INCHSIZE_W]
height: [SIDES_INCHSIZE_H]
color2: [SIDES_TXTCOLOR_2] [SIDES_TXTCOLORNAME_2]
font2: [SIDES_TXTLINE_FONT_2]
line3: [SIDES_TXTLINE_3]
width: [SIDES_INCHSIZE_W]
height: [SIDES_INCHSIZE_H]
color3: [SIDES_TXTCOLOR_3] [SIDES_TXTCOLORNAME_3]
font3: [SIDES_TXTLINE_FONT_3]
*END OF EXAMPLE*
The above example creates the following text file:
parser: stickerz-payment-rtd
email: rickXXXX@hotmail.com
tng_orderid: 0000097632
company:
name: RIK HACXXXXXXXX
address: 229XXXXXXXXX
city: BONESEO
st: IL
Zip: XXXXXX
Phone: XXX-227-XXXX
comments:
notes:
shipping: 5.95
shipmethod: UPS ⇒ Ground
Acceptance: Yes
Comments:
link: http://designer.realtimedesigner.com/stickerz/orders/index.php&p=b3JkZXJfaXXXc2MzI=
NEW ITEM
item: COLORCARDS
unitwt: 0.005
price: 0.05
qty: 1000
add-ons: Base: 0.045 each
background color: 255,255,255
color: [SIDES_TXTCOLOR_1]
product: FULL COLOR BUSINESS CARDS
description: Landscape Format (3.5×2)
line1: Handyman
width: 4.25
height: 2.75
color1: 32,79,149 “Blue”
font1: 7_Arial
line2: Services
width: 4.25
height: 2.75
color2: 32,79,149 “Blue”
font2: 7_Arial
line3: 912-674-4566
width: 4.25
height: 2.75
color3: 0,0,0 “Black”
font3: 7_Soutane
XXXX's have been placed in the file to protect the users privacy.
DOWNLOADING USER DESIGNS
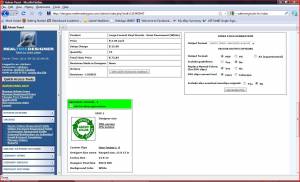
From the lower portion of the Order Details page, you can access the item specific data. The
GENERATE FILE button is used to download the users design. There are various options. We
encourage you to try the various options to find the best solution for the software combination that you
use. Three important things about downloading users designs….
- Always verify the artwork files before printing - you will likely need to do minor adjusting.
- If you allow tools that are not supported in the vector output, these items will not appear correctly in the output.
- Vector downloads are fast but require some adjustment. Bitmap downloads are much slower, but are nearly identical to the design the user saw on his screen.


