This is an old revision of the document!
Chapter 9 - Pricing Products
DEFINING PRICING
Once you have defined products, you have the option of defining pricing for those products using a look-up matrix (table) concept. Pricing is one of the most flexible aspects of the RTD. Your pricing can be dependent on most any combination of size, quantity, number of colors, clip arts, and any number of product specific add-ons that you can envision. To keep your pricing structure simple, you will want to consider all these things when defining your products. You can define multiple similar products, each with its own pricing matrix. An example of this is Plastic Yard Signs - they might be available in 1 or 2 sided, with or without a frame. This could be set up all in 1 product, 2 products (1 sided or 2 sided), or 4 products (1 sided w/frame, 1 sided w/o frame, 2 sided w/frame, 2 sided w/o frame). There is no right or wrong way - choose whatever works best for your site. If you create specific links on your site to each of these options, your clients will have less to choose from once they enter the RealTimeDesigner. Of course you can turn pricing off for any or all products if you wish.
VERIFYING PRICING
When configuring your site your pricing should be verified by extensive testing. Testing should consist of making test orders of as many combinations as you can devise. RealTimeDesigner.com is not responsible for any errors encountered in pricing products or shipping charges. You should include a disclaimer on your site to allow you to adjust pricing in the instance of a wrong price being generated due to a condition you did not anticipate. This will cover you as no matter how much testing you do, you can never account for every combination that your users will come up with.
APPROACH TO PRICING
Rather than going line by line through the pricing screen, as was done in previous chapters, lets approach Pricing from a different angle. We will build several example pricing models, eventually utilizing all the features, explaining them as we go. By the end, hopefully you will either have an example very close to your needs or you will have learned the techniques well enough to conjure up a combination that fits your needs. All the pricing models assume you are on the CONFIGURE PRICING STRUCTURE SCREEN. The Configure Pricing screen is different from the Configure Pricing Structure screen in that only the pricing numbers can be changed in the Configure Pricing screen - the structure of the tables can not be changed. This may be useful if you task someone with updating prices but don't want to change that they may inadvertantly delete a column or entire table.
PRICING MODEL 1 - ONE PRICE FITS ALL
The most basic pricing model charges the same price for a product regardless of the quantity or complexity of the design. To set up this model follow these steps:
- In the upper yellow box, ENABLE PRICING.
- In the DEFINE PRICING ADDONS box, type BASE PRICE in the NAME field.
- In the DEFINE PRICING ADDONS box, select RAW PRODUCT BASE PRICE on the APPLY AREA field.
- In the DEFINE PRICING ADDONS box, click on ADD FIELD button.
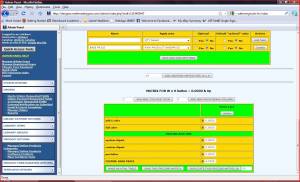
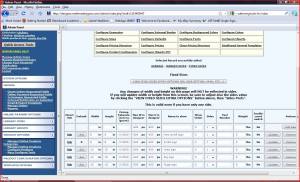
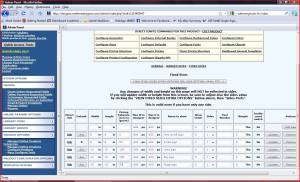
- At the bottom of the screen, the table should look like this: [screen shot]
- Enter “4.75” in the “CUSTOM: Base Price” field in the FROM 1 PC. column.
- Click SAVE THIS PRICING MATRIX.
PRICING MODEL 2 - QUANTITY PRICE BREAKS
Building upon the structure of Model 1, let's offer a discount when several pieces are ordered:
- In the Pricing Table at the bottom of the screen, enter “12” in the box next to the ADD NEW PRICE BREAK COLUMN
- Click the ADD NEW PRICE BREAK COLUMN button
- Enter “4.50” in the “CUSTOM: Base Price” field in the FROM 12 PC. column.
- Click SAVE THIS PRICING MATRIX.
- Complete the process again for a quantity of 24 and price of 3.95.
PRICING MODEL 3 - CHARGING BASED ON NUMBER OF COLORS IN THE DESIGN
Building upon the structure of Model 2, let's start charging for ink colors. This model will have specific prices for the 1 color designs, then all subsequent colors will be charged at the rate shown in the ADD COLOR row.
- In the Pricing Table at the bottom of the screen, enter “1” in the box next to the ADD NEW COLORS ROW.
- Click the ADD NEW COLORS ROW button.
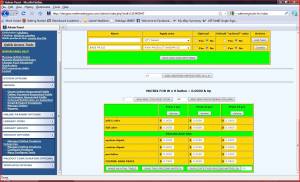
- Enter prices as shown here:
PRICING MODEL 4 - ALLOW UNLIMITED COLORS, CHARGE ONLY FOR FOUR
Start with Model 3 above.
- In the upper yellow box, locate the DISABLE 4 COUNT COLORS LIMIT? control.
- Set the “DISABLE 4 COUNT COLORS LIMIT?” to YES to charge for all colors.
- Set the “DISABLE 4 COUNT COLORS LIMIT?” to NO to max out the color charge at 4 colors regardless of the number of colors used.
PRICING MODEL 5 - SCREEN CHARGE
Start with Model 4 above.
- In the DEFINE PRICING ADDONS box, type SCREEN CHARGE in the NAME field.
- In the DEFINE PRICING ADDONS box, select COLOR BASED on the APPLY AREA field.
- In the DEFINE PRICING ADDONS box, click on ADD FIELD button.
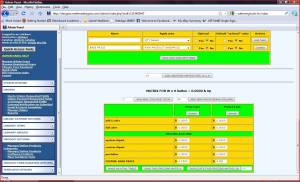
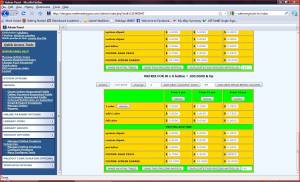
- At the bottom of the screen, the table should look like this: [screen shot}
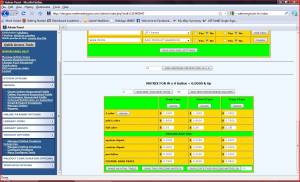
- Enter numbers as shown in here: [screen shot]
- In the designer, test, test test.
PRICING MODEL 6 - SIZE BASED PRICING
This model will show how to create pricing tables that will calculate based on the size of the product.
- Using the PRICING TEST PRODUCT, go to the CONFIGURE PRODUCT > CONFIGURE SIZE > FIXED SIZE screen
- Return to the CONFIGURE PRICING SCREEN for the PRICING TEST PRODUCT.
- Enter “100” in the box next to “DUPLICATE THIS PRICING MATRIX IN”
- Pricing should now calculate so that the 2 smaller products which are under 100 square inches use the “0 & UP” pricing table and the larger product uses the “100 & UP” pricing table.
- Test this thoroughly using the various sizes of that product.
PRICING MODEL 7 - SIZE OVERRIDE
This model will show how to use the SIZE OVERRIDE to trick or override the actual measured size. This technique allows you to create very compact pricing tables even when you have many fixed sizes within a product.
- Using the PRICING TEST PRODUCT from Model 6, go to the CONFIGURE PRODUCT > CONFIGURE SIZE > FIXED SIZE screen
- Using your knowledge of Product Configuration, alter the FIXED SIZES as shown. [screen shot]
- Return to the CONFIGURE PRICING SCREEN for the PRICING TEST PRODUCT.
- Enter “200” in the box next to “DUPLICATE THIS PRICING MATRIX IN”
- Enter values in the table as shown.
- Pricing should now calculate so that the products with “0” size override use the “0 & UP” pricing table, products with “100” size override use the “100 & UP” pricing table and products with “200” size override use the “200 & UP” pricing table even though there actual sizes do not fit those ranges.
PRICING MODEL 8 - RANGED SIZE PRICING
Thus far we have been working with FIXED SIZE products. Ranged Sizes are not much different. Even though there can be a multitude of size combinations for ranged sizes, the calculated size is still the height times the width (H x W). Whichever pricing table corresponds to the calculated size will be used to determine the pricing.
PRICING MODEL 9 - INTERPOLATED PRICING
Interpolated pricing is a very neat trick that allows you to create a pricing table for the smallest size of
the product and another pricing table for the largest size of that product. Regardless of what size is
chosen by the end user, the price is calculated on a linear scale (linear interpolation) between the two
pricing tables. Creating just two pricing tables is obviously much quicker than creating a table for
every size combination. To enable linear interpolation locate the field titled “CALCULATED PRICE
CHECKING” in the top portion of the PRODUCT CONFIGURE > CONFIGURE PRICING
STRUCTURE screen. Select INTERPOLATE COLORS AND CLIPART and click SAVE
PREFERENCES.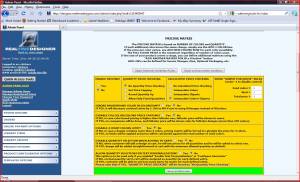
PRICING DETAILS
Now that we've gone through several examples and the screens no longer look so intimidating, we will now explain each of the pricing table tools.
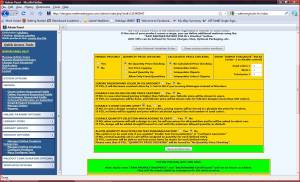
- ENABLE PRICING - disable this to turn pricing off for this product only
- QUANTITY PRICE CHECKING - defines how to handle quantities and price breaks. Example is item priced at $0.45 for 100-249, and $0.40 for 250-499. Customer asks for 240. Should he be charged $108 or $100?
- No Quantity Price Checking - Turns the feature off
- Set Price Capping - Cap pricing at lower of selected quantity and next price break
- Round Quantity Up - Increase quantity to next price break
- Allow Only Fixed Quantities - Allows only price break quantities to be selected from drop down list
- CALCULATED PRICE CHECKING - This is the interpolation feature that was demonstrated in PRICING MODEL 9 example above. Instead of reading a price directly from a table based on the product size, this feature finds the closest tables below and above the size and interpolates a price. In it's simplest form it can be thought of as SQUARE FOOT PRICING, but it can do a whole lot more.
- No Calculated Price Checking - Turns the feature off
- Interpolate Colors - Interpolates the pricing calculation based on colors
- Interpolate Clip arts - interpolates the pricing calculation based on the clip art pricing
- Interpolate Colors+Clip arts - A combination of both colors and clip art interpolations (use this onewhen in doubt)
- SUBMIT FOR QUOTE RULES - This feature acts as a safety net in to catch combinations you haven't foreseen or if you simply want to price certain orders manually. If this is triggered, the customer will not be given the option to pay for this item - he will only be able to submit it for a quote. Put ”-1” in these fields to deactivate this feature.
- Used colors - Enter the number of colors that will trigger pricing to turn off (if you are working with full color or digital images, leave this one ”-1”
- WxH - If you want to turn off pricing when the overall size exceeds a certain value, enter it here
- Total price - If you want to turn off pricing when the overall price of the item exceeds a certain value, enter it here
- IGNORE BACKGROUND COLOR IN COLORCOUNT - Controls whether the background color is used in counting the number of colors.
- DISABLE FULLCOLOR/COLORS PRICE CAPPING - Determines how to handle color counting for full color artwork.
- DISABLE 4 COUNT COLORS LIMIT - Determines whether to max out the color count at 4 colors - i.e. Process Color.
- DISABLE QUANTITY SELECTION WHEN ADDING TO CART - Turns off the quantity selection process. Use this feature if you prefer to handle quantity and pricing outside of RealTimeDesigner i.e. external cart system.
- ALLOW QUANTITY SELECTION FOR TEXT PERSONALIZATION - This feature is used if the customer will likely be ordering some of each size offered for that product, i.e. a dozen shirts 2 SM, 3 MED, 4 LG and 3 XL.
- PRODUCT ADD ONS - System Clip art, Custom Clip art and Per Letter Add-ons are in every pricing table. You can also define any number of additional add-ons for a product. In the cart, users will be shown the add-ons and be given the opportunity accept of deny the optional ones.
- SYSTEM CLIPART - A specified charge for system clip art
- CUSTOM CLIPART - A specified charge for user uploaded clip art
- PER LETTER CHARGE - This counts the number of text characters in the design and multiplies by the per letter fee. This technique is useful for vinyl letter pricing - set a per letter fee along with square foot pricing (see Calculated Price Checking).
- RAW PRODUCT BASEPRICE ADDON - This one is used to set the base price of a product when the color count matrix is used for the decoration price, i.e. shirt base price is $5, decoration costs $2 per side, per color. For simple 1-sided products, the entire price can be inserted into the color count matrix and the Raw Product Base Price is not used. Further discussion on Product Base Price is provided below.
- QUANTITY BASED ADDON - Adds the same number of these as items selected by the user, i.e. 50 frames for 50 signs.
- COLOR BASED ADDON - Adds one charge for each color in the design, i.e. screen charges
- FULL COLOR BASED ADDON - Adds one charge if the design has triggered full color test
- TEXT PERSONALIZATION BASED ADDON - If added, it will provide a pricing matrix entry that will be multiplied by the number of text personalization customer submitted. So, if customer creates a design with 3 text personalization variations, price will increase by “defined add-on * 3”. - Again in “Pricing structure” there's also the new “ALLOW QUANTITY SELECTION FOR TEXT
- PERSONALIZATION?” option. This option is to be used only if you enabled “Enable Text Personalization” in “Configure Generator” If NO, normal quantity set in cart will be assigned as quantity for each defined entry. If YES, customer will be able to set how many items he wants for each defined entry. Please note that if YES, “QUANTITY PRICE CHECKING” will be forced to “No Quantity Price Checking”
- BACKGROUND COLOR BASED ADDON - ???????????
Note: Check out the Product Configurator chapter if the Pricing Add-ons don't accomplish what you need.
- ADD ANOTHER MATRIX FOR W x H - Adds another pricing matrix table to the product. This matrix will be a raw, unformatted one with no color counts or price break columns. See Duplicate Matrix In below.
- DUPLICATE THIS MATRIX IN - Adds another pricing matrix table of the identical format to the current one. This save a lot of time - simply fill in the new pricing values.
MORE DISCUSSON ON PRODUCT BASE PRICE
Product Base Price - if you are using products which can be printed differently on various sides, we've added a new add-on pricing category called RAW PRODUCT BASE PRICE. Use this feature to set a base price and the normal pricing matrix can be used to define the pricing for each printed side. At the end - the pricing will be summed to get the total price. Even single sided products can benefit by using this feature. If your product is priced at $20 setup plus $5 per square foot, put $20 in as the BASE PRICE. The base price can even vary for each price break quantity if desired. If you set the BASE PRICE different for various sizes, the higher base price value will be used. This can get a bit complex to describe all the possible scenarios. Let us know if you have specific questions regarding multi-side pricing. Like everything related to pricing, be sure to test it thoroughly before making it live for your customers. Here's the steps for using the Product Base Price:
- From Configure Pricing Structure Screen, in the box titled “DEFINE PRICING ADD-ONS HERE” type in “BASE PRICE” in the Name box.
- Use the pull-down and select “RAW PRODUCT BASEPRICE”
- Click “ADD FIELD”
- In the Pricing Matrix you will now see the line labeled “CUSTOM: BASE PRICE” - Enter your base price here and save your changes.


